
In this article we will explain how to control TestNg execution from Jenkin
Pre - Requisites:
- Intellij is installed
- Jenkin is installed
- TestNGResults plugin is installed on Jenking.
Steps:
Open Intellij and create a new maven project


Project is created, now we have to download Selenium and TestNG. We will add the dependencies of both and maven will download them for us.
Go to https://mvnrepository.com/ and search for Selenium and TestNG


Copy the dependencies on POM file and click on "Import Changes" , it will download all dependencies .

We we add a TestNg.xml file and change the PM as following.
TestNG.XML
<?xml version="1.0" encoding="UTF-8" standalone="no"?><!DOCTYPE suite PUBLIC "http://testng.org" "http://testng.org/testng-1.0.dtd"><suite name="BASHIR">
    <test name="BASHIR">
        <classes>
            <class name="MavenDemo.DemoTestNG">
                <methods>
                    <include name="googleSearch"/>
                </methods>
            </class>
        </classes>
    </test>
</suite>
POM.XML
<?xml version="1.0" encoding="UTF-8"?><project xmlns="http://maven.apache.org/POM/4.0.0"         xmlns:xsi="http://www.w3.org/2001/XMLSchema-instance"         xsi:schemaLocation="http://maven.apache.org/POM/4.0.0 http://maven.apache.org/xsd/maven-4.0.0.xsd">
    <modelVersion>4.0.0</modelVersion>

    <groupId>1</groupId>
    <artifactId>1</artifactId>
    <version>1.0-SNAPSHOT</version>
    <properties>

    </properties>


    <dependencies>

        <!-- https://mvnrepository.com/artifact/org.seleniumhq.selenium/selenium-java -->        <dependency>
            <groupId>org.seleniumhq.selenium</groupId>
            <artifactId>selenium-java</artifactId>
            <version>3.141.59</version>
        </dependency>

        <!-- https://mvnrepository.com/artifact/org.testng/testng -->        <dependency>
            <groupId>org.testng</groupId>
            <artifactId>testng</artifactId>
            <version>7.0.0-beta3</version>
            <scope>test</scope>
        </dependency>

    </dependencies>


    <build>

        <plugins>


            <plugin>
                <groupId>org.apache.maven.plugins</groupId>
                <artifactId>maven-surefire-plugin</artifactId>
                <version>2.21.0</version>
                <configuration>
                    <suiteXmlFiles>
                        <suiteXmlFile>testng.xml</suiteXmlFile>
                    </suiteXmlFiles>
                </configuration>
            </plugin>


            <plugin>
                <groupId>org.apache.maven.plugins</groupId>
                <artifactId>maven-compiler-plugin</artifactId>
                <configuration>
                    <source>1.8</source>
                    <target>1.8</target>
                </configuration>
            </plugin>

        </plugins>
    </build>

</project>
Open Jenkins. By default it will be ‘localhost/8080’
Click on ‘New Item’

Enter an Item Name of your preference. I gave the name as ‘MavenProject ‘. In the screenshot below, you could see the name as MavenProject (ignore it).
Select ‘Freestyle Project’ and click on OK button

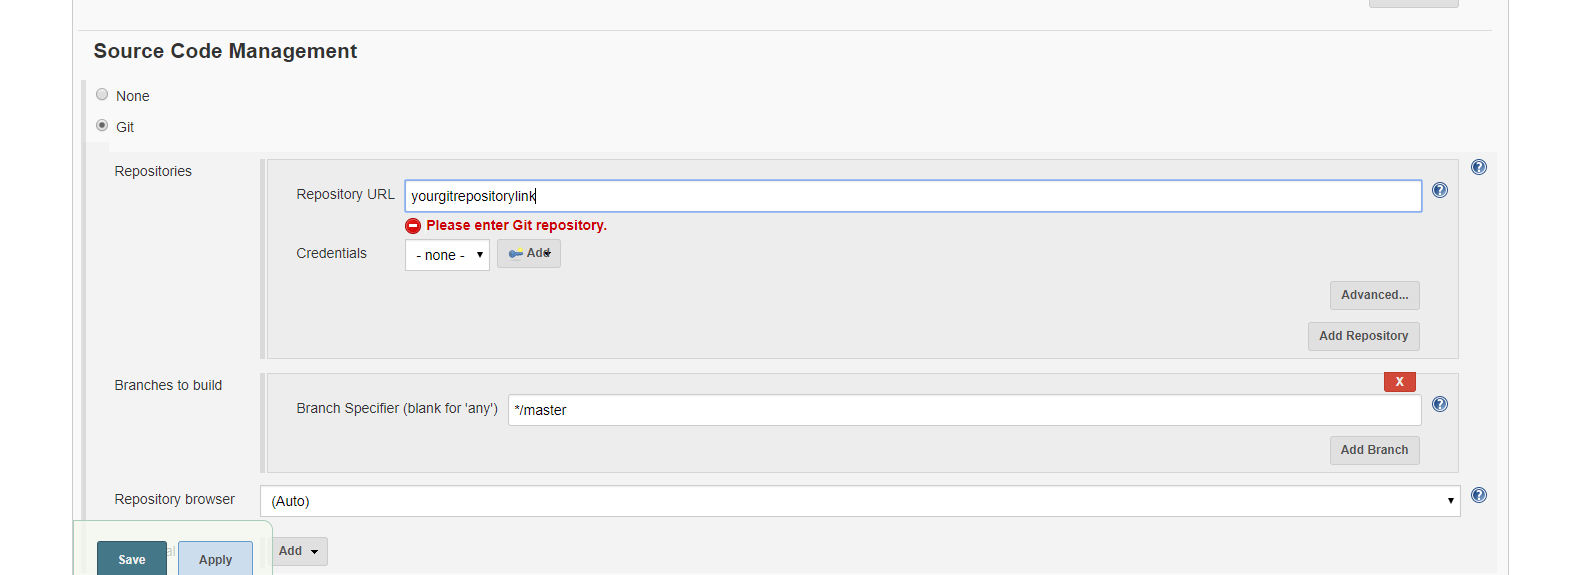
Select GIT and clone the above created project using URL
https://github.com/seeramzan/TestNgWithJenkin.git
Under the Build section, add the maven commands as below


Now configure the post actions as below to see the results.


and click on Save.
You are done with the configuration. Now click on "Build now"

From Console Output you can also view the outcomes of the test and finally you can view the test results form TestNgResults tab.


Post a Comment